Tuesday, November 24, 2009

Foxen Canyon View

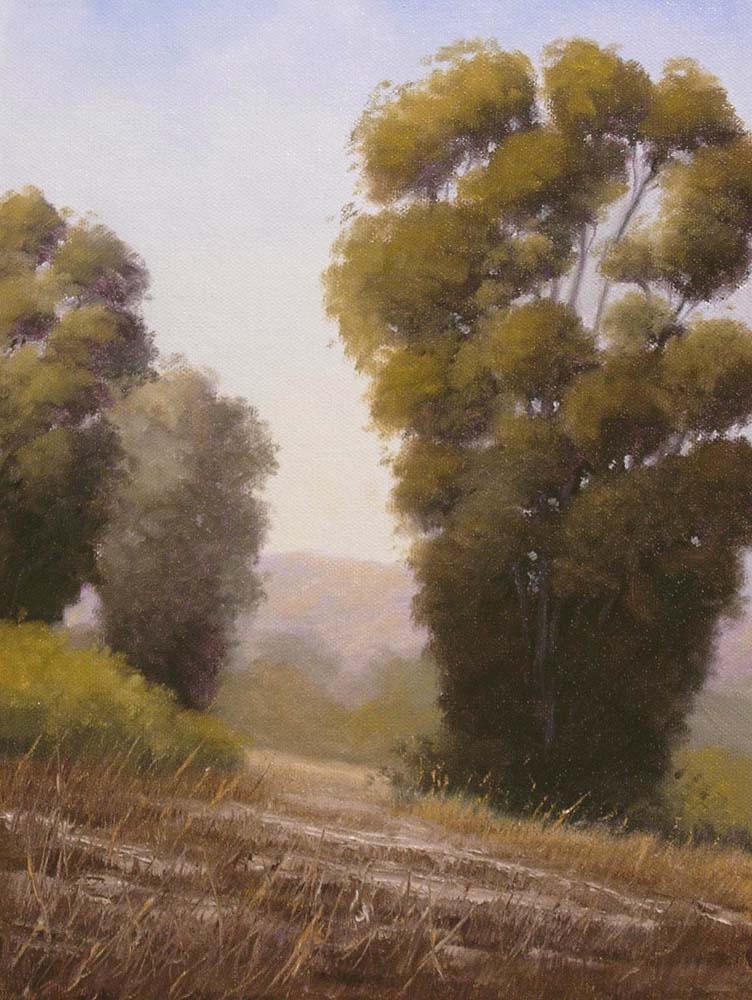
" Foxen Canyon View"
8" X 10" Oil on canvas
Painted this small 8X10 to capture the wonderful warm tones of the hills around Foxen Canyon. Foxen canyon is such a great canyon to take a drive through. The valley floor is lined with vineyards, farmlands and grazing cattle. It has a twisting 2 lane road that runs all the way up to the Santa Maria valley. I like the area due to the great colors it has in the summer and fall months. Wonderful varied ochres accented by the olive colors from the stands of oaks.

In Spring there will be California poppies and lupine scattered throughout the canyon. Alisos canyon connects to Foxen canyon and offers incredible meadows of lupine and grazing cattle.

Here are details of the painting....

Monday, November 23, 2009

Studio Tour 2009

Paintings on display at the entrance to the studio.

Artist Studio Tour 2009
Well, it has come and gone! A weekend of putting the studio and my work on display for those interested in art, artists confines and the info an artist cares to share with them. Preparation for this began way back in Spring as I began to paint specifially for this show which comes every November. Overall, I think I painted some really good pieces, desert scenes from the Carrizo Plain and Mojave desert, some additional nocturnes and some large Central Coast scenes. The studio looked great, the work looked great, framing was working and I was ready. Maybe I should have spent more time on preparing myself for the low sales this last year has produced.
The National and State economy are keeping patrons from enjoying art purchases. I knew this going into the show but maybe didn't expect it to be so severe this year. I have always done well in this show with each one being more succesful than the previous year. This year I was down more than 75% in sales. I actually shouldn't feel so bad as many artists on the tour had no sales at all. Not a good year. I could write much more on this but that is going to get totally negative and won't solve a thing...depressed...you bet! Still painting though.
Here are some pics I took just before the show started on Saturday morning.
Normally the drying wall, paintings were framed and ready for public viewing in the studio

My easels used for plein air painting in the studio.
I got some really nice comments and signatures in the old guestbook. Copies of my book were available and sales made of that.

Studio Show Painting

"Eucalyptus in Evening"
9" X 12" Oil on panel
During the lulls in our studio show I used the time to work on another painting. Time is not to be wasted so I jumped at the opportunity to use it wisely. This painting allowed me to work more on eucalyptus trees and pushing distance in my paintings. This painting is another in a long line of paintings working to paint better and I'm pretty happy that each painting in that line teaches me.

Details of the painting....
Nice rich darks which I love painting...not black, it's a dark mixture of French Ultramarine Blue/Alizarin Crimson/Cadmium Yellow Pale. The tree trunkss are simply Titanium White with a dab of FUB to add the shadowed color of the truck shaded by foliage.
Rock practice...that's right. I added these big boulders more for my practice than for the composition of the painting...they work and I'm a happy camper......a very fun painting!

Friday, November 20, 2009

Eucalyptus

I have somehow managed to start a new routine while getting ready for the show this weekend. In staying up late, drinking tons of coffee and after doing things for the show I have managed to do another painting before bed...I always loved painting at night anyway, hahaha. Actually, all the fuss in getting ready for the show causes me to feel guilty I'm not painting so I end up just staying up late to paint. This one was finished at 3:30 AM. I should call it "The Nightowl Eucalyptus".
Not from any reference photo, just painting away in hopes of completing another painting and brushing up on trees. I'm not a fan of the eucalyptus trees that look like this...I call them pom poms....but I have to try painting them anyways. I like the bushier ones that are commonly used for windbreaks on farms and ranches around here. So many trees...so little time.


"Near The Foothills"

9" X 12" Oil on panel

I really like the foreground in this one as well as the background...really fun parts to do. The tree was painted a little differently than I normally do these so it took me a little longer to paint. I think it will take me a few paintings to get used to seeing them this way...

Here are some details.....


Wednesday, November 18, 2009

Trying the Pochade Box

Was up late last night readying for the show and decided I couldn't wait any longer to try a painting out with the new pochade box. I decided to get the easel setup and do a painting. I chose a ref photo I took of the oak scattered foothills below nearby Grass mountain. The easel worked great but I need to build an attachment to hold my wet brushes. Seems to be a good steady platform though so I'm looking forward to getting out before it gets too cold to do it.
How organized huh!?...Don't sweat it...a few paintings down the line and that area for mixing will be a mess that only I can make my way through. I took this photo right after the scene was blocked in and I had started working back to front.


Here is the finished painting before I took it down to get a good photo. Sorry for the glare.

And lastly the finished painting...I'm pretty happy with it and trying out the new pochade box was lots of late night fun.
"Oaks Below the Figueroas"

9" X 12" Oil on panel

Tuesday, November 17, 2009

Evening Scene

"Near The Eve"
12" X 24" Oil on panel
I am readying for a studio tour and have been doing all sorts of things other than painting. You just have no idea how cluttered and unorganized your studio can get until you have to straighten it up for a studio tour....and then there is all of the framing and hanging involved too.
I decided to stop for a bit to paint a scene yesterday. I wanted wide and I wanted to do some trees again since I have been doing so many vineyard scenes lately. I needed the tree practice...still do! hahaha. A couple of months ago I did a scene of Santa Ynez looking across the valley at the mountains all lit up at sunset and decided to try that again but in a more muted way. I wanted the focal point to be on a trail I would add and not so much on the blazing mountain colors.

Lately in my work I have been trying out thicker, impasto, foregrounds or around my center of interest. I really enjoy impasto work especially on these little trails. It brings a nice bit of realism to the painting and adds to the viewers interest I would think. I find it hard not to enjoy that thick texture. The composition on this one is really like a full circle-type comp. The eye should be led from one part to the next until it returns again. Well, that was the plan anyways.
A detail of the trail. I was dragging that shadow from the tree across the grass and decided to drag it across the trail too.
In the past I rarely did a lot of trunk and branch work...I'm pushing myself to add these more and more now. I hated my early results but they are coming along nicely.

Sunday, November 15, 2009

Tres Hermanas Vines

" Tres Hermanas Vines"
9" X 12" Oil on panel
This is a plein air piece that was done out at the Tres Hermanas Vineyard in Foxen Canyon. I did a show out there a couple of years ago and thought I'd go back up there to try some plein air work...this is the third one I've done up there. It's a good spot because there isn't much traffic, no pedestrians and I can just pull off to the side of the road to set up my gear...no hiking! Bonus!!


I like the vineyards in the morning light because the tops of the vines get this great morning light and pop the heck out of the green against the dark undergrowth. I also like this angle of the vines too and my spot out there is right at the end of the rows.
A detail of the painting........

Thursday, November 12, 2009

Homemade Pochade Box

My Serrett Pochade Box
I've been wanting to build a pochade box much like the $300 models you can buy without spending the $300. Jim Serrett had built such a box, the Serrett Pochade Box, using simple contstruction methods and scraps of wood keeping costs down and making building the box as simple as you can get. I've got to admit the reason I kept putting this off is that I kept thinking the results would be very unprofessional and look it. I couldn't understand how the lid hinge would work without looking like some contraption from a Jules Verne novel. All of the ones I saw that were homemade really looked homemade. Jims looked pretty good so I decided to just build it and make it work but keeping it as affordable as possible.
I downloaded Jim's instructions and worked from those. I couldn't find the piano hinge he used so I used normal brass hinges. The table hinge that I bought was different and I had to cut off a bracket on mine and hammer part of the other end to make that work but it works great and looks good. Both of these parts came from Home Depot. I used a piece of hardwood (oak) for the mounting block underneath that holds the T-nut for mounting the box to the tripod. I'm not a fan of this though and if I did this again I'd probably use the Judsons mounting plate that costs around $19. It's an all-welded aluminum plate that would last longer than the box itself. I'll give the T-nut a try and see how that goes. I also added a strip of wood to accomodate my longer hinge screws for the lid. No biggie there.
The lockable hinge worked out excellent. I was worried about the single bungy cord holding the panel to the lid...looked kind of weak but it actually works great. The panel is snug against the lid and not flopping around at all. Simple and effective and the wind won't blow it loose at all.

Overall, if you want one of these types of pochade boxes and don't want to part with $300 you can build it for hardly nothing. I don't think I paid more than $20 for all of the material. I used an air powered brad nailer but you could do this with small finishing nails and a hammer. I have a table saw too but all of the wood can be cut with a hand saw. It's a great little box and can handle anything up to 9"x12" panels.


Wednesday, November 11, 2009

Falkner Vineyard Retouch


This was my 3rd painting in the Falkner show. In the image above you can see what it looked like near it's completion. I thought it looked pretty good but later seeing it hanging I felt the foreground was all wrong. I was going for a more loose plein air look to that part of the painting and it looked like it at the time. Yesterday I decided to go back in and do some touching up...finish the foreground to a more finished look and touch up a few other areas while I was at it.
Here is the finished version...and yes, the colors are more accurate in the final version...my camera loves blue and green and picks it up way too much.
Some details....

I like the painting and think the touch ups help the painting more. I don't like to really touch up painting that were painted plein air. I like the idea of going out and painting a scene and bringing it back to the studio to set it aside to dry, varnish and frame. I like the plein air pieces to really speak for themselves as a record of my plein air progress. No, I'm not a plein air purist who feels it has to be 100% painted plein air. I just like to see how far I have come to getting a better finished look when painting outside. We all have our own self imposed goals to follow and that's one of mine. With this one though that foreground was screaming for a finished look.
That reddish foreground was a steep hillside filled with these reddish/black looking tumbleweed shaped plants splattered across it. A lot of the painters at the show were not happy with that area too. Something like that has to be ignored, replaced or dealt with. I chose to deal with it to learn how to paint it. Other painters down there did too so it's good to see I'm not the only glutten for punishment, hahaha. It's how you learn....paint what you've not done or what looks really hard to you. Most painters look at a scene and visually paint it in stages in their heads before ever attempting to actually break out the real paint and brushes. That's what I do when choosing a scene. Sometimes you run across stuff like this hillside and decide "how am I going to do this". One of the best ways to deal with it is to pick your distance. If you back up and paint it from afar it gets easier. Mountains are always like that with me. I can paint them much easier from a distance than close up. The San Gabriel mountains above Pasadena are totally like that. Easier than sin to paint a half a mile away but get closer and man you are going to go through some pain painting those guys. I love those mountains but they can really knock a painter on his butt at times.

Tuesday, November 10, 2009

Falkner Art Invitational

The show at the Falkner Winery was so much fun. I painted with some good friends and despite low sales due to the economy I had a blast. There were some really good artists out there who I had never met nor painted with, Rich Gallego, Steve Curry, Marla Baggetta, Michael Alten to name just a few. Stunning works coming out of all of these artists. We had 2 beautiful days to paint and by the end of the show there were some seriously good work hanging.

I ran into fellow artists Bruce Boycks, Karen Winters and Laura Wambsgans and had a great time talking with them. These are some really good artists themselves.
Here is a pic of my 3rd painting in progress.

Some of the work being hung during the show. That's Laura Segal from the Segal Art Gallery in Monrovia.Here I am trying out my new french easel during the show. It's pretty good but unless you scrape off the paint from your pallette it is very easy to get paint smeared onto the drawer and lid. Once you begin to fold the legs and rest it against yourself you end up with paint on your clothes. I never had that problem with my trusty pochade box. Friends Bruce Boycks, Rich Gallego and myself at the start on Saturday.Rich Gallego and Steve Curry before the show reception started.

Friday, November 06, 2009

Plein Air Weekend Show


Just a reminder to those who live in Southern California. I will be plein air painting this weekend down in Temecula at the Falkner Winery. The public is welcome to attend this big wine shindig and there will be several artists painting away both Saturday and Sunday. There will be an artists reception on Saturday so please come by and hang out, talk shop and enjoy some wine!

Monday, November 02, 2009

Thomas Van Stein Lecture

Under The Hunters Moon
I had the good fortune tonight of attending a lecture on Nocturne painting with Thomas Van Stein. The lecture was at the Wildling Museum in Los Olivos, CA. I had been waiting for over a month to go to this event. The wait was well worth it. Van Stein spoke about the history of nocturne painting while presenting a slideshow of nocturne images, some of which I had not seen, images by Turner, Whistler, Van Gogh, Frank Tenny Johnson, Rembrant, Remington, Granville Redmond and a host of others were shown. Van Stein also presented images he had painted in France and along the California coast.


Thomas Van Stein with demo painting on the left and one of his framed works on the right.

After the presentation was finished we all went outside where Van Stein had his easel set up for a demonstration of nocturne painting. This was great and allowed us to see how Van Stein works his magic. Van Stein chose this night as it would be under the Hunters Moon. Earlier in the evening before sunset the moon had risen and was quite the sight to see. I took this photo from the backyard shortly before heading over to Los Olivos for the presentation. The Hunters moon was showing it's dominance over the landscape and why so many of us artists are drawn to painting it in our nocturnes.

Van Stein was very gracious and allowed us to ask any questions we wanted while he painted. The painting was completed in about 30 or so minutes to a level he deemed enough to finish off the small details later in the studio. I was amazed at how fast he was able to block in color and then refine the painting all with a minimum of light. Van Stein uses two book lights mounted to the easel and a Maglight mounted on the cap he wore. After the demonstration we all went back into the studio to see the painting in better light. Here is a close-up of the Demo painting...not a very good photo because you can't see the detail and color work in it. Sorry about that.

It was a beautiful brightly lit night that was perfect for this demonstration. I had a great time and was able to speak to Thomas who is a very cool guy. I learned a few things and saw some deadly nocturne paintings in his presentation so it was a very good night. I wish I had remembered my camera in the car to show more pics but I was busy drooling over the nocturnes.
Click here to see more of Van Steins Work

Sunday, November 01, 2009

Wet Canvas Carrier

9" X 12" Wet Canvas Carrier
made from scrap pine lumber

I'm tired of placing a wet painting in the car trunk or on the floor of the car and hoping like heck something doesn't fall on it or it flips over. I decided it was time to get a wet canvas carrier. I went online looking for one and found that they run around $60 for a 9" X 12" model....with that I wandered down to my garage to see if I had any scraps of wood to just make one...I did so I headed off to Ace Hardware and bought the needed hardware, hinge, hasp, handle and feet...the last two aren't neccesary but cool to have. Cost was about $10. This was based on a box built by Jim Serrett but for 9x12 panels. After a fun afternoon spent in the garage building it I can give you 50 reasons to build your own. Note....a table saw helps immensely.
A wet canvas carrier is basically a box with strips of wood inside used to keep your paintings seperated while transporting them. I made my box to carry wet panels made from 1/4" masonite that are covered with canvas. This is what I normally paint on. You could make your box to carry whatever you paint on. I'm pretty sure that Ray Mar panels are thinner so you'd have to adjust the spacing for that if you paint on Ray Mar panels.

The box was made from a sheet of 1/4" scrap wood for the sides, bottom & lid and 3/4" for the ends that have the strips glued and nailed to hold the panels. If I did this again I would have made the top out of 3/4" because it would have made nailing on the hinge and hasp a lot easier. I took a wide sheet of wood and thined it down to 1/4" thickness and then cut the strips for the inside first. The strips are cut wider than 1/4 so it will make it easier to get my fingers on the panels when removing them from the box. It is also better if these are wider so your nails or brads have plenty of room to go through the wood strips without splitting them.
The piece of wood with the divider strips is 3/4" thick and 4" wide. The length was cut just over 12" long to allow for panels not cut exactly at 12". Once you build these two ends you then put in a panel and that tells you how wide your sides will need to be cut. To get the length of your sides you just add the thickness of your lid and bottom to the length of these end panels. My ends were just over 12" so I add the bottom (1/4" thick) and the top (1/4" thick) and you come out with just over 12, 1/2".
Sounds technical but once you build your end panels with the thin divider strips everything else is just measured off of that. It is a lot easier to build it than it is to describe it. Fun project.